

A creative video editor to create your own movies and slideshows.
- Latest Version: 24.6.0
- License: Trial
- Final Released: 08/07/2024
- Publisher: Movavi Software Limited
- Operating Systems: Windows 11, Windows 10, Windows 8.1, Windows 8, Windows 7
- System Type: 32-bit & 64-bit
- Setup File: MovaviVideoEditorSetup_24.2.0_64_bit.exe
- Category: Video Editing Software
- Uploaded: FileOur.com
About Movavi Video Editor
Movavi Video Editor is an intuitive video editing software. The work of video editing can be done very easily and perfectly. It’s edited any project with complete high-quality technology.
It is capable of performing many tasks simultaneously, including video editing, recording, video cutting, and audio. Even you can convert videos to a variety of formats.
It is considered to be one of the most popular video editing software in the world. Millions of people around the world are taking it seriously. This software has been at the top since its inception.
This software is capable of many other types of work. As such it is capable of many kinds of work including video editing, video slide shows, attaching pictures to video, cutting video and attaching audio.
Fast YouTube Video Maker
It can even do video editing much smoother and faster. It is capable of many types of high-quality work.
Movavi creates video clips by attaching images to videos, cutting large video files into small clips, creating video clips using a variety of designs and colours, and connecting sound to video clips.
This video you can directly share this on your YouTube channel.
Audio Recorder
In addition, it can work in a format with high-quality capabilities. It even ranks as the best software for doing effective audio recording. Just record your voice then easily combine it with your movie.
Slideshow Maker
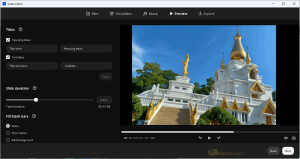
It has a powerful feature called “Slideshow Wizard” that allows you to create many HD animations and slideshows with a few steps. This can be used to create videos by attaching pictures to pictures and easily make a stylish photo slideshow.
- Go to the File menu and select Create Quick Video
- Add favorite images then press
- Select Templates as you like then press
- Choose music or add anyone from the PC then press
- Add title/subtitle and set the slide duration then press
- Finally, save the slide video or directly upload it on YouTube, Google Drive, Vimeo or TikTok.
Regular Updates
The latest version of this software is already available for download. The final version has already been released for 2024. If you need high-resolution video editing software download it from the Play Store today. Once downloaded, install the software and start using it.
How to Install?
-
- Double-click on the installer.
- Read the terms and conditions then check “I accept the terms of the License Agreement”. Press to continue.
- Finally, click to close the setup wizard.
Features/Interface
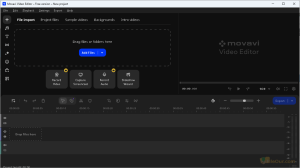
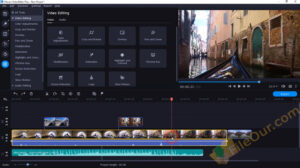
First, you will see some suggestions on its interface, you can skip it if you want.
At the top, there is a menubar where you get the necessary options.
On the left side are eight useful features that make video editing easier.
| + Insert | Press the Insert option to add video, audio and photos.
There are five main options/features. File import – Add your files or folders from your computer. But you can also record videos from a camera or an external device, record video from the screen or record audio through a microphone. |
|---|---|
| ♬ Audio | To add sounds and background music to your video. |
| Τ Titles | Add fun and stylish titles to your video. |
| ∞ Transitions | Add beautiful animation between clips to merge them. |
| ✰ Effects | Apply overlay effects to your videos and photos. |
| ☹ Elements | To add cool graphics, shapes, stickers and frames to your video. |
| Here you will get hundreds of great effects right in the video editor. | |
| ⊞ More tools | Enhancements and special effects for the selected clip.
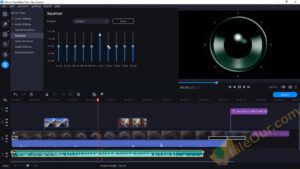
Video Tools Adjust video color – To change the color settings, select a template or adjust the color manually. Crop and rotate video – To remove the black bars, cut off the edges of the video, or permanently zoom in on an object inside a frame, adjust the video borders in the player. Add and Arrange frames – To set a frame position, drag one of the clips to the track of the additional video and click on the template. Pan and zooming – To adjust the camera movement in the frame, select a clip on the Timeline and drag the template onto it. You can also zoom specific video clips. Stabilization – To remove camera shake from the selected clip. This may take some time for longer videos. Animate an object – To animate an object, select a clip on the Timeline, apply a template to it, or adjust the animation manually. Highlight or conceal an object – To highlight or hide an object, select a clip on the Timeline and the mask to apply. Chroma key – To replace or remove the background on the video, select the clip and drag it to the track of the additional video, use the eyedropper to select the color you want to remove. Remove the background – Add a new background by placing it on the track below the edited clip, or save the video without a background. Scene detection – Scene detection automatically detects changes in the video scenes and cuts the video into separate clips according to these changes Add logo – You can add favorite logo to your video. Slow motion – Use this tool to slow motion your video or any specific part of it. Audio Tools Add audio effects – To add audio effects, select a clip with an audio track on the Timeline. Select an audio effect and drag it to the audio track. Equalizer – To change the audio frequency levels, select a clip with an audio track on the Timeline, select an Noise removal – Use these noise removal methods to delete all unwanted sounds automatically. Block the unwanted noises – To attenuate signals below the threshold, set the parameters and block unwanted sound from your audio. Sound compression – Set the parameters to reduce the volume of loud sounds or amplify quiet ones. Reverberation – Add a reflected sound effect to make a sound more voluminous. Synchronization – Sync separately recorded audio and video by sound. Beat detection – Select an audio clip to detect its audio beats and show the beat markers on the Timeline. You can use the beat markers to adjust the tempo of your project. |
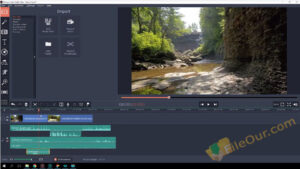
Finally, you will find its editing interface where you can edit your video as you like and export it.
Minimum System Requirements
- Processor: Intel®, AMD, or compatible dual-core processor, 1.5 GHz or above
- Memory: 512 MB RAM
- Display: 1280 x 768 or better
- Graphics Card: Intel HD Graphics 2000, NVIDIA GeForce series 8 and 8M, AMD Radeon R600 or higher
- Hard Disk: 1500 MB free space





all editors use movavi for quality product in project