

Best online gaming, chatting and streaming platform.
Size: 114.67 MB
About Discord
Discord is a chat app or chat program whatever you want to call it. If you’ve ever used Telegram, Skype or WhatsApp, this app might look familiar to you. I find it very similar to Skype.
Some of its features are advanced level from other chatting apps which impressed me. Discord is one of the most lightweight apps. I have used and realized that it uses low latency, minimum CPU and all these things. I like to use it for group messaging or just messaging in general.
Here you can easily connect with friends, social community or work team. You can even create groups or channels and chat with friends via voice/video or text. In this case, you can share important files with your partner.
At first, it was very popular only among gamers. Back then many people created game-related channels and developed gaming communities by discussing or live streaming with other gamers using Discord app. But now this platform has become a widely used online chatting app all over the world.
Download and Install Discord for PC
It is a cross-platform software that can be installed on Windows, Mac, Linux, Android or iOS devices. If you want, you can operate the same account from any device.
- First download Discord’s latest version from the site. Its best feature is that it installs on your PC in one click.
- Go to the downloaded location.
- Double-click on the DiscordSetup.exe
- You don’t have to do anything else. Wait a while. The app will automatically install and open on your PC.
Create a New Discord Account
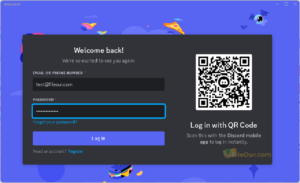
You can create a Discord account using a mobile number or email ID as you like. If you want to create an account with a mobile number, then press the phone number. Search your country. If you want to create an account with an email address then press ‘Email’. Type your email address.
- Go to the bellow and click on ‘Register‘
- Add an email ID
- Type your name
- In the ‘USERNAME‘ type any username which your friends can easily find you.
- Type the password as you want
- Enter your date of birth
- Click on ‘Continue‘
- Now a popup window will appear. Confirm here if you are human. If confirmed comes the Captcha. Select the captcha and click ‘Verify’.
Once all the processing is done the Discord account will be created successfully. But you must verify the account.
How to Verify a Discord Account?
But before using the app you must verify the account. If you have an account with a phone number, then a message will come from Discord on your mobile. Open the message.
If you have a Discord account with an email ID check your mail. A verification link will appear from Discord. Verify the account by clicking on ‘Verify Email’.
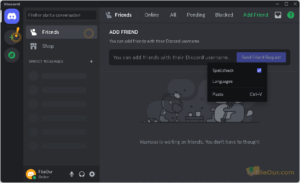
The server list will appear on the or side of the dashboard. How many servers or channels you are connected to will be displayed here.
If you click on the server option, no server will be listed first. In this case, you will see here if you create a server or join a server.
Customized Discord’s Profile Picture
- Go to the Discord’s dashboard
- Click on the profile picture. Select profile picture you want.
- You can select Custom Profile picture if you want. You can also choose Avatar below. You can also skip it if you want.
- Click the “Next”
- Finally, the App dashboard will open.
Create a Discord Server
Here you can create a private or public server to connect with community members.
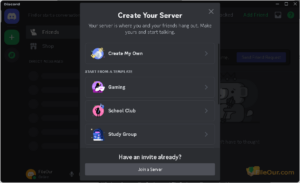
- On the left side click icon to create the server.
- Select the reason that you want to create the server.
- If you want to create your own server then click on ‘Create My Own’.
- Here you will get two methods, For a club or community and For me and my friends. Choose any of these methods depending on the size of your community.
1. For a club or community: Create a Community Server…
By selecting this you can create a very large server.
- Select community.
- Upload profile picture or avatar. Type your favourite server name and click on ‘Create Server’
- Notice here that a link has been created.
Now share this link with all friends in your community. You can even share the Discord server link on social platforms. This will allow your friends to join your server.
Now go to your server dashboard. Notice the top left side. An option is displayed indicating your group name. Clicking this option will start your server. Swipe left. Go inside the server. If you swipe left again, you will get the details of who is a member of your server.
You can create different channels inside this server if you want. Invite your friends by creating a text channel or voice channel here.
2. For me and my friends: Create an individual Server…
Here you can create a server to connect only with your friends. In this case, the server cannot be enlarged.
- If you select the method you will go to the next option.
- Upload profile picture or icon. Type your favourite server name and click on ‘Create’.
- Type any topic and click ‘Done’. If you want you can skip the option.
- Click ‘Take me to my server’. Okay! now you have successfully created a new server.
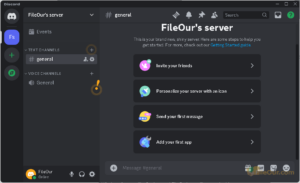
Now you will show your server dashboard. Here display the following options.
- Invite your friends by clicking on ‘Invite your friends‘.
- Add and change your server logo by clicking on ‘Personalize your server with an icon‘.
- Send your desired message to your friends by clicking on ‘Send you first message‘.
- Easily download the Discor app by clicking on ‘Download the Discor app‘.
Go to bellow left side. Click the ‘User settings’ option. Here you can customize your server profile information.






Leave a Reply